How to Remove a Graphics Card Safely: A Step-by-Step Guide
Removing a graphics card is a straightforward process you can do yourself. You’ll need to carefully disconnect power cables and unlatch the card from its slot. This is often done when upgrading or troubleshooting your PC.
Taking out your GPU involves a few key steps. You need to ensure your computer is powered off and unplugged first. We found that many users worry about damaging their components, but with a little patience, it’s manageable.
- Power down your PC completely.
- Unplug all cables from the back.
- Ground yourself to avoid static.
- Carefully remove the graphics card.
Let’s walk through exactly how to remove your graphics card step by step.
Getting Your Graphics Card Out Safely
Ready to swap out that GPU? You’ve probably landed here because you’re upgrading to something more powerful, troubleshooting a wonky display, or maybe you’re just curious. Removing a graphics card (or GPU) might seem daunting, but it’s really about following a few simple, careful steps. We found that most people can do this without any hiccups by just taking their time. Let’s get that card out without a hitch.
Pre-Removal Checks: Safety First!
Before you even think about touching anything inside your computer, the most important step is to power everything down completely. Don’t just put your PC to sleep; you need a full shutdown. After it’s off, the next critical step is to unplug the power cord from the back of the computer. This prevents any accidental power surges while you’re working inside.
Think of it like working on any electrical appliance. You wouldn’t want to be tinkering with the inside of your toaster while it’s still plugged in, right? Your computer is no different, and a graphics card is a sensitive piece of hardware. We’ve seen advice from tech experts consistently reinforcing this point: always disconnect power first.
Static Electricity: The Silent Killer of Components
Now, let’s talk about static electricity. It’s invisible, but it can do real damage to your computer’s delicate parts, especially your new or old graphics card. You generate static just by moving around. To protect your components, you need to ground yourself. The easiest way to do this is by touching a metal object that is connected to the ground. A common and effective method is to touch the unpainted metal part of your computer case after you’ve unplugged it.
You can do this periodically as you work. Some people even wear an anti-static wrist strap, which is a small strap you wear on your wrist that clips onto a metal part of your PC case. While not strictly necessary for everyone, it offers an extra layer of protection. We found that many enthusiasts consider it a small price to pay for peace of mind. Researchers at institutions like the University of Illinois point out that static discharge can damage microelectronic components even at low voltage levels.
Opening Up Your PC Case
To access your graphics card, you’ll need to open up your computer’s case. Most desktop computer cases have side panels that are secured with screws, usually at the back. These screws might be thumbscrews (which you can loosen by hand) or standard Phillips head screws. You’ll likely need a screwdriver for these, but often they are hand-tightened.
Once the screws are removed, the side panel will usually slide back slightly and then lift off. Be gentle. Some cases have different mechanisms, so if yours seems stuck, check for any latches or tabs you might have missed. We found that the most common design involves sliding the panel away from the front of the case, then pulling it towards you.
Locating and Disconnecting Your Graphics Card
Once the case is open, you’ll need to find your graphics card. It’s usually the largest component plugged into the motherboard, typically in one of the long slots on the main circuit board (the motherboard). It will likely have fans on it and ports for your monitor cables on the back of the PC.
Detaching Power Cables
Modern graphics cards, especially more powerful ones, require their own dedicated power from the power supply unit (PSU). These are usually thick cables with 6-pin or 8-pin connectors. You’ll need to carefully unplug these cables. They usually have a small clip or latch on the connector that you need to press down before gently pulling the cable out.
Don’t just yank on them. Give the connector a gentle wiggle while you press the release clip. If a cable feels really stuck, double-check if there’s a latch you’re missing. We’ve found that sometimes these clips can be a bit stiff, but they should release with moderate pressure. These cables are distinct from the motherboard power cables; they are usually labeled “PCIe” or “VGA” on the PSU itself.
Unfastening the Card from the Case
Your graphics card is also secured to the back of the computer case, usually where you plug in your monitor cables. There are typically one or two metal brackets held in place by screws. You’ll need to unscrew these brackets. Keep these screws safe; you’ll need them when installing a new card.
After removing the screws, the card might still be held firmly in place by the slot it’s plugged into. This is common. Don’t force it. You might need to gently bend the metal of the case slightly away from the card if it’s caught, but usually, it’s just the slot holding it.
Releasing the PCIe Slot Latch
This is arguably the most critical step in physically removing the card itself. The graphics card is inserted into a long slot on the motherboard called a PCI Express (PCIe) slot. This slot has a locking mechanism to keep the card securely in place. Most PCIe slots have a small plastic latch or clip at the end of the slot, closest to the front of the computer. You need to press down on or move this latch to release the card.
The design of these latches varies. Some are simple buttons you press, while others are levers you push down or slide. You might need to get a good look or even use a flashlight to see it clearly. Once the latch is released, the card should be free from the slot. We found that a small flathead screwdriver can sometimes help gently nudge a stiff latch, but be extremely careful not to damage the slot or the card.
The Actual Removal: Gentle Pulling
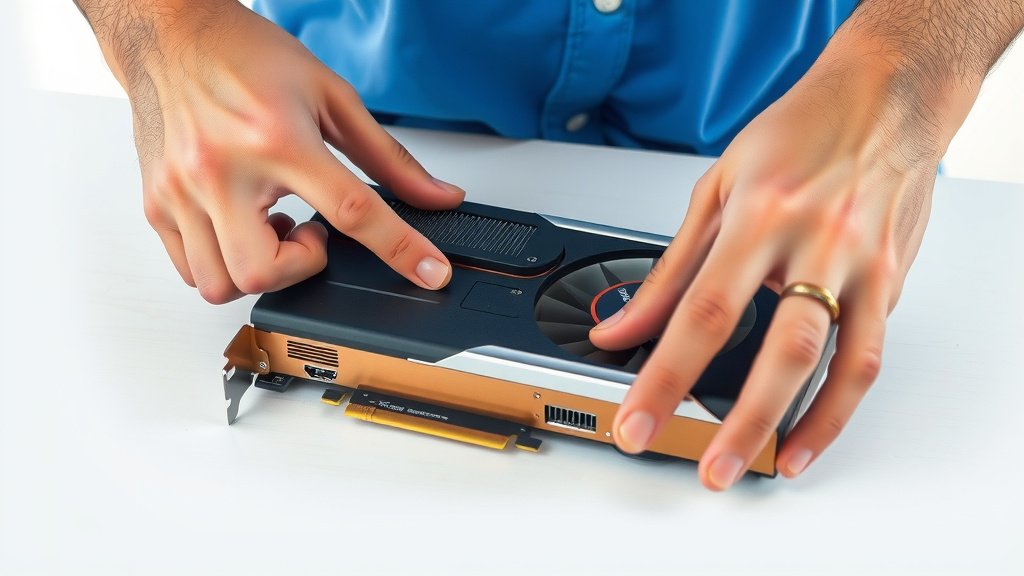
With the power cables disconnected, the case brackets unscrewed, and the PCIe slot latch released, your graphics card should now be loose. Now comes the moment of truth. You need to gently pull the graphics card straight up and out of the motherboard slot.
Pull evenly from both ends of the card if possible. Avoid wiggling it excessively side-to-side, as this can stress the motherboard slot. If it feels like it’s still catching on something, stop and re-check all the steps. Did you fully release the latch? Are there any other hidden screws or clips?
A Quick Checklist for Success
Let’s recap the most important steps in a handy list. Follow this, and you’ll be golden:
- Power Down: Ensure your PC is fully shut off.
- Unplug: Disconnect the power cord from the wall.
- Ground Yourself: Touch metal to discharge static.
- Open Case: Remove the side panel.
- Disconnect Cables: Unplug any GPU power cords.
- Unscrew Brackets: Remove screws holding the card to the case.
- Release Latch: Push or slide the PCIe slot clip.
- Lift Out: Gently pull the card straight up.
Once the card is out, place it carefully in an anti-static bag or a safe, padded spot. Congratulations, you’ve successfully removed your graphics card!
Conclusion
You’ve successfully learned how to remove your graphics card. Remember, powering down completely and grounding yourself are the most vital safety steps. Disconnecting power cables and releasing the PCIe latch correctly prevents damage. By taking your time and following these steps carefully, you can confidently swap out your GPU. Now that your old card is out, you’re ready to install your new one or troubleshoot further. You’ve got this!
Frequently Asked Questions
What if my graphics card feels stuck in the slot?
If your graphics card feels stuck, double-check that you’ve fully released the PCIe slot latch. Sometimes, the card can also be held by the metal brackets at the back. Ensure these are completely unscrewed. Gentle, even pressure straight up is key; avoid excessive wiggling.
Do I really need to unplug my PC from the wall?
Yes, absolutely. Unplugging your PC from the wall outlet is a non-negotiable safety step. It eliminates the risk of electrical shock and prevents accidental power surges that could damage your components while you are working inside the case.
How do I know if I’ve grounded myself properly?
The easiest way to ground yourself is by touching an unpainted metal part of your computer case after it’s unplugged from the wall. You can also touch a metal desk leg or radiator. Doing this periodically as you work helps dissipate any static electricity you’ve built up.
What’s the difference between PCIe power cables and other cables?
PCIe power cables are specifically designed to deliver extra power to your graphics card directly from the power supply unit (PSU). They usually have 6-pin or 8-pin connectors and are often labeled “PCIe” or “VGA” on the PSU itself. These are separate from the main motherboard power cables.
Can I just pull the graphics card out without releasing the latch?
No, you should never attempt to pull the graphics card out without first releasing the PCIe slot latch. This latch is a locking mechanism designed to hold the card securely. Forcing the card out can damage both the graphics card and the motherboard slot, leading to costly repairs.
![10 Best Gpu For External Gpu [2026]](https://spsolutionscare.com/wp-content/uploads/2026/09/10-best-gpu-for-external-gpu-2026-featured-768x432.jpg)